By Rich Jenkins
Rich Jenkins, with his wife Gail, travel the country in search of adventure in their Roadtrek, “Hula Girl.”
Would you like to have an option for the original equipment folding front table in your coach?
This simple and inexpensive DIY shows how to change that out for an attractive and functional replacement front RV table top, for less than $30.
Most of us are familiar with the front folding table that Roadtrek uses in their coaches, which origami's outward, using four folding leaves. It is heavy, and a little cumbersome, and can snap your fingers, if not closed carefully.
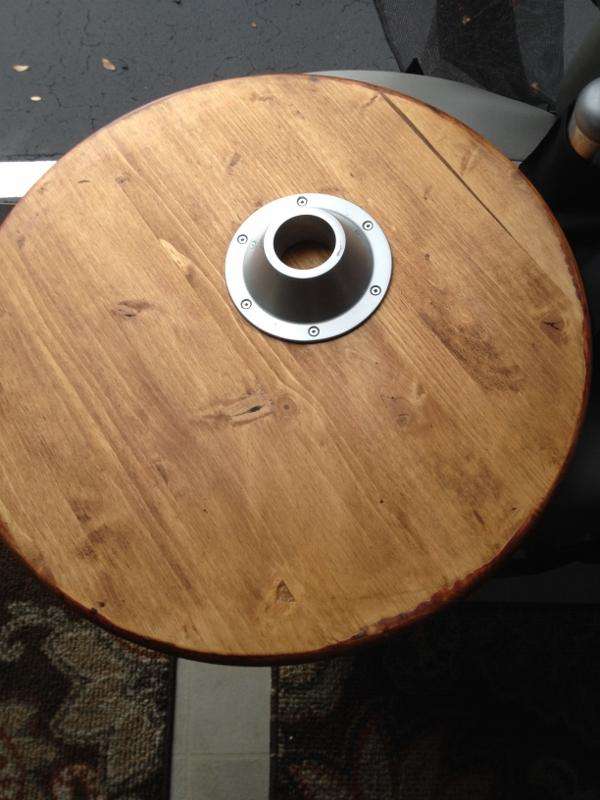
Recently, I saw this idea from a post by Roadtreking member, Marykat Maat Dyer, and decided to duplicate her creation. She used a readily available round wood tabletop, stained and finished, together with the bracket from the original Roadtrek table, to make a replacement table that really complements the interior.
The start of this DIY begins at your local large hardware or lumber store, to purchase a stainable wooden round 24” “tabletop.” Locally here to us in Tampa in the states, we bought a poplar version of the table, they are also available in spruce. Below is a typical example, $17.57 at Lowe's:
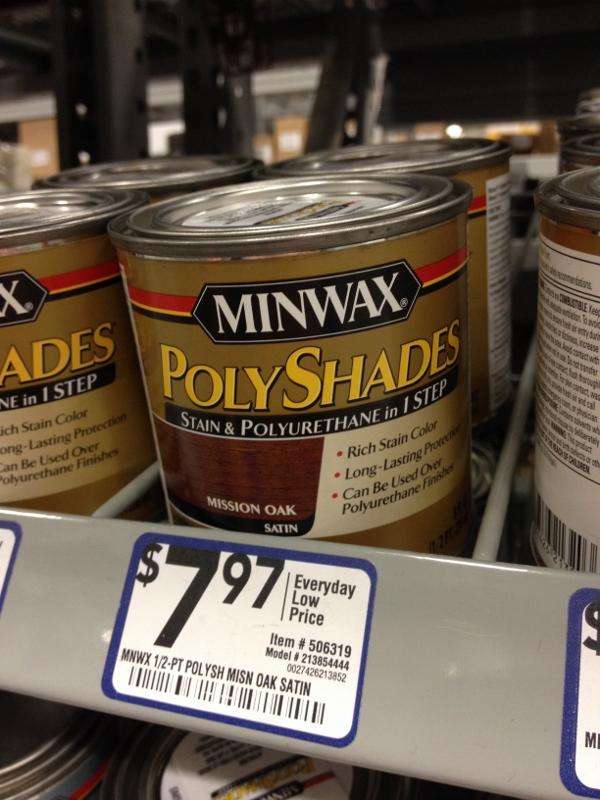
Once you have the tabletop home, you can proceed to stain it. Not being a woodworking expert in the slightest, after a bit of light sanding, I chose a simple, combined stain and finish in one, by Minwax. I found that the “Mission Oak” color, with three coats, gave a reasonable approximation to the original Cherry Cabinetry that we have in our coach.
After you have the table stained and finished to your satisfaction, you just need to mount it.
The table bracket is held on by six square head 1/2” woodscrews. Remove the original bracket, saving the screws. I have a small cordless drill/driver, but you can also use a square head screwdriver.
Then (and this is important!) set up the front seats in your coach to suit your desired seating arrangement. Place the support leg in place, and lay the tabletop on the bracket.
When you get the table the way you like it, mark the location of the bracket under the table with a pencil.
Remove the table top and turn it over. Then place the bracket on the bottom, where you marked it. It will very likely appear “out of center”. But, because you set it up for your position, it will be perfect.
Position the bracket, then drill six small pilot holes for the screws.
DIY Hint: I use a small length of Gorilla tape, and wrap it around my drill bits, to serve as a makeshift “drill stop”. This prevents the drill bit from going too far into the wood. Easy does it here.
With the pilot holes ready, simply reuse the same six screws, and fasten the bracket in place on your new table top.
Flip the top over, install it on the support post, and you are ready to enjoy your new lightweight front table!!
3 Responses to “Roadtreking DIY: Inexpensive RV Front Tabletop Replacement”
Comments are closed.


January 26, 2016at7:11 pm, FiendishThingy said:
I like this idea also. But I’d like to go one step further in favor of laziness: I think I’ll buy one wood TV tray at WalMart, which already has a finish on it, remove the legs, and put the underneath-bracket on that, instead of buying a round, sanding, multi-coating a finish.
February 17, 2015at1:43 pm, Maxine Whiteside said:
We made the round table and love it….was wondering where you store when not using, thanks
December 08, 2014at7:21 pm, Angelique Montgomery Goodnough said:
This is a fantastic idea! I really struggle with the foldout table. I am going to make the round table this weekend. Love the color. Thanks for great photos and step-by-step instructions. My 2006 RS Adventurous is named Stevie Ray Van, Stevie RV for short.